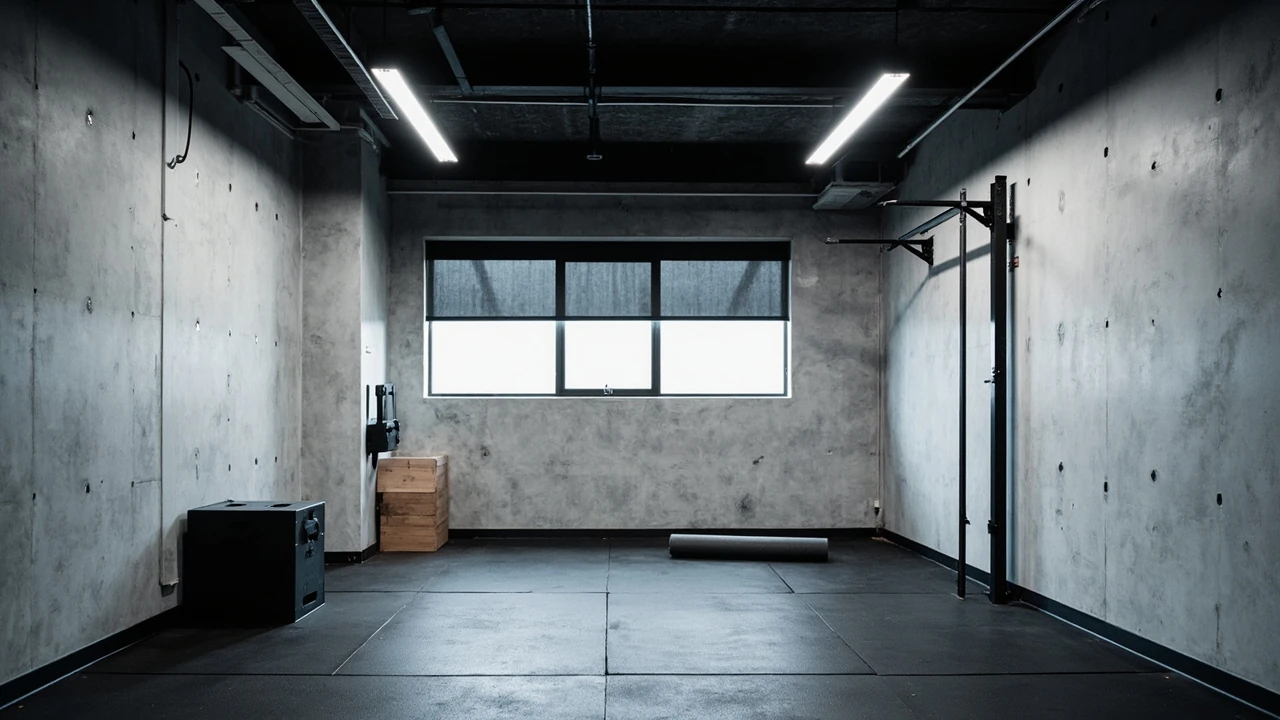
Sports basement design ideas that turn unused space into a training room
A spare basement often sits as a holding zone for boxes, holiday decorations, and a treadmill nobody uses. Converted well, the same floor plan becomes a sports basement where a gymnast trains handstands, a basketball player shoots the same spot a hundred times, or a parent and child roll out a mat for basic drills. The room does not need to be large, and it does not need a six-figure budget. It needs a clear sport, honest measurements, and a few decisions about flooring, ceiling height, air, and light.
This guide walks through those decisions in the order a real build goes in: defining what the room will host, measuring the space, picking flooring and wall finishes, planning air and light, choosing equipment, then finishing the details that make a basement feel like a real training space rather than a converted storage room. Whether the goal is gymnastics at home, off-season basketball, or a shared family workout zone, the same planning logic applies.
Start with the sport, not the equipment
Equipment decisions get easier once the sport is fixed. A gymnastics-friendly basement looks very different from a basketball or hockey training space, and a general fitness room sits between the two. Write down one or two activities that will actually happen in the room during a normal week, then design around those.
- Gymnastics at home: requires wall-to-wall matting, clear ceiling height for handstands and basic saltos, a strip of wall padding, and a clear approach to whatever bar or beam is installed.
- Basketball and ball sports: need a hard, even surface, a wall or portable hoop at regulation height, and protection for nearby windows, lights, and the ceiling.
- Strength and conditioning: centers on a rubber floor, a rack or rig, free weights, and space for sled pushes or jump rope without hitting a wall.
- Multi-use family space: mixes forgiving flooring, fold-away equipment, and a layout that can switch between a kid’s play mat and an adult workout within minutes.
Pick the dominant use first. Secondary uses can share the room, but they should not dictate the floor, the ceiling protection, or the equipment anchors.
Measure the room and the ceiling before buying anything
A basement rarely has the open volume of a purpose-built gym, so the first job is to take honest measurements. Write them down in a small notebook or on a phone, because they will guide every later decision.
- Floor area: the full rectangle, minus the stair footprint, the furnace or water heater closet, and any support columns.
- Ceiling height: measured under the lowest obstruction, which is usually a duct, a beam, or a light fixture, not the flat ceiling surface.
- Door and hallway widths: these limit the size of equipment that can be carried in later, especially rigs and folding mats.
- Window and egress points: basements are often required by code to have an emergency exit. Note the size and position, because they affect where mirrors and racks can go.
- Slope and level: check the floor with a long level. Even a small slope can roll a heavy rack across the room over time.
As a rough working number, most at-home gymnastics work needs at least 7 to 8 feet of clear ceiling, and ideally 9 feet, so a handstand or a low basic can be done without fear. Strength training can live with 7 feet if the rig height is matched to the ceiling. Basketball shooting on a 7 to 8 foot wall-mounted hoop is realistic in shorter basements; a 10-foot rim often needs 9 feet of clear height plus a couple more feet for the player’s reach.
Pick a floor that protects both the slab and the athlete
The bare concrete slab in most basements is hard, cold, and unforgiving. It also wicks moisture, which can be a problem for anything placed directly on it. The floor choice sets the feel of the whole room and the safety of every drill done on it.
Common basement sports floor options
| Floor type | Best fit | Comfort | Ball bounce | Moisture care |
|---|---|---|---|---|
| Interlocking rubber tiles (8–25 mm) | Strength, conditioning, general gym | Good to very good | Dead, no real bounce | Tolerate damp slab once sealed |
| Closed-cell foam mat tiles (20–40 mm) | Kids play, light gymnastics, stretching | Soft, warm underfoot | Very dead | Use a vapor barrier underneath |
| Plywood subfloor with sport vinyl or carpet | Multi-use family rooms, low-impact training | Warm and quiet | Limited, depends on top layer | Needs a full moisture barrier system |
| Poured rubber or polyurethane surface | Permanent home gyms, basketball shooting areas | Excellent when paired with underlay | Predictable, slightly lively | Installed by a specialist over a sealed slab |
| Sport carpet tiles over rubber underlay | Quiet cardio zones, kids’ areas | Soft, very quiet | Dead, slows fast-moving balls | Carpet must be removable for drying |
For a gymnastics-leaning sports basement, foam or rubber tiles over a thin sealed underlay are usually enough. For a basketball shooting station, a smooth, sealed surface like a low-pile sport vinyl on a flat slab plays more predictably than thick foam. For a strength room, dense rubber tiles win because dropped weights, kettlebells, and sleds punish softer floors.
Whatever the choice, lay a 6-mil polyethylene vapor barrier directly on the slab if the basement has ever shown any sign of dampness, and tape the seams. A moisture problem under a sealed floor is far more expensive to fix later than a barrier added during the build.
Decide what the walls are doing
Basement walls often double as the backstop for throws, shots, and falls. They also tend to be cold, and they sometimes carry damp. A simple plan turns them into a useful part of the room rather than an obstacle.
- Paint and seal first. A masonry sealer on bare concrete blocks stops dust and slows moisture migration. Two coats of a durable eggshell or semi-gloss paint over that give the room a finished feel.
- Add padding where falls happen. A 4 by 8 foot panel of 2-inch wall padding behind a handstand line, a low bar, or a kids’ play zone prevents most bruises and most drywall repairs.
- Use plywood backings for future anchors. Before finishing the walls, screw 3/4-inch plywood sheets into the studs wherever a bar, a hoop, a rig, or a heavy TV might eventually go. Future mounts then hit wood instead of hollow drywall.
- Protect windows and lights. A simple polycarbonate sheet over a basement window stops most stray basketballs. A wire cage over a ceiling fixture stops an accidental barbell from cracking the lens.
Get the air and the light right before equipment day
Basements are notorious for stale air, low ceilings, and dim light. A sports basement uses the room harder than a storage basement, so the air and the light need an upgrade, not a patch.
For ventilation, plan on a quiet inline fan that brings in fresh air from outside and an exhaust that pulls used air out. A simple setup uses one supply vent near the training area and one return vent on the opposite wall. If the basement has a bathroom or a laundry dryer, the existing exhaust can be part of the plan, but it should not be the only path. For heating, a small electric or low-output gas unit keeps the space usable in winter without drying the air. Many strength athletes and gymnasts prefer a slightly cooler room anyway, because training raises body temperature quickly.
For lighting, a single ceiling bulb is not enough. Plan a grid of flush LED panels at about 3000 to 4000 kelvin for a clean, daylight feel. Add a second zone of brighter, cooler light on a separate switch over the main training area, so the space can be lit for general use or for high-focus drills. Avoid exposed bulbs and pendants over the training zone, because any contact from a ball, a bar, or a body is a hazard.
Plan storage and the daily reset
A sports basement fails fast when equipment takes over the floor. The fastest path back to a usable room is honest storage. Most home gyms do well with a three-zone plan: a wall zone, a corner zone, and a mobile zone.
- Wall zone: a French cleat strip or a slatwall holds mats, belts, bands, and small accessories. Items live up off the floor, which makes cleaning easier and the room look more like a real gym.
- Corner zone: a vertical rack for barbells and plates, a cubby for medballs, and a bin for shoes keep the heaviest gear in one place.
- Mobile zone: a folding plyo box, a wheeled sled, and a mat cart let one person reset the room in a few minutes.
Set a rule that equipment returns to its zone at the end of every session. The room stays ready, and the next training day starts with the floor already clear.
Choose equipment that earns its footprint
Basement space is finite, so equipment has to pull its weight. A short list of versatile pieces often beats a long list of single-use machines.
High-value pieces for a multi-use sports basement
| Equipment | Sport fit | Floor footprint | Why it earns its place |
|---|---|---|---|
| Folding 8-panel mat (4 by 8 ft each panel) | Gymnastics, martial arts, kids’ play | Folds flat against the wall | One mat covers tumbling, stretching, and play; clears away in 60 seconds |
| Power rack with pull-up bar | Strength, gymnastics cross-training | About 4 by 6 ft | Supports squat, bench, pull-ups, and band work in one footprint |
| Adjustable dumbbell set | Strength, conditioning | Sits in one corner | Replaces a full rack of fixed dumbbells |
| Wall-mounted low bar | Gymnastics basics, mobility | About 6 ft of wall | Useful for kips, pull-overs, and shoulder prehab at home |
| Portable basketball hoop (wall or ceiling mount) | Basketball, ball control | Stand-alone or fixed | Creates a true shooting station without a full court |
| Foam pit or soft landing zone | Gymnastics, freestyle | About 6 by 6 ft | Softens new skills; build a contained pit, not a loose foam pile |
| Mirror panel (4 by 6 ft or larger) | All sports, especially gymnastics and dance | Wall-mounted | Form feedback is the cheapest coaching tool a basement can have |
For a gymnastics-led basement, a mirror is non-negotiable for solo practice. For a strength-led basement, a power rack is the single best investment. For a basketball-led basement, a properly mounted rim at a realistic height turns a few square feet into real practice.
Sound, neighbors, and shared walls
Basements sit below living rooms, bedrooms, and sometimes neighboring units. A dropped barbell is louder than most people expect, and a basketball on a hard floor is a fast way to lose goodwill at home. Plan for sound during the build, not after the first complaint.
- Floors: dense rubber over a foam underlay drops most impact noise. A full plywood subfloor system can be quieter still, but costs more headroom.
- Walls and ceiling: adding a single layer of 5/8-inch drywall with resilient channel onto the existing ceiling reduces footstep and bar noise upstairs. A basic acoustic panel on the wall behind a hoop softens echo.
- Equipment behavior: control descent, not just lift. Bumper plates and controlled drops keep the sound inside the rack. A basketball with a quieter foam cover is a small change that pays off fast.
- Schedule: agree on training hours with the rest of the house. Most family-friendly basements run on a 7 a.m. to 9 p.m. window, with loud plyometrics saved for daytime.
Safety checks that take ten minutes but prevent most injuries
Most basement injuries come from a small set of predictable causes. A short safety pass once a month catches nearly all of them.
- Walk the floor barefoot and in socks. Any grit under a mat is a slip risk. Sweep and vacuum before every training session.
- Check the gap between the mat edge and the wall. A rolled ankle finds that gap every time.
- Test wall padding anchors with a firm push. Wall padding that moves is wall padding that fails on impact.
- Look up. A loose light fixture, an exposed bulb, or a hanging cord is a head-strike hazard.
- Keep a clear zone of at least 6 feet around any bar, rig, or hoop. Mark it with floor tape if needed.
- Mount a small fire extinguisher near the door. Basements with rubber flooring and electrical equipment should not rely on the upstairs kitchen one.
- Add a basic first-aid kit to the wall. A cut or a blister handled in 30 seconds does not end a training session.
How to phase the build without ending up with a half-finished room
Most people do not finish a basement in one weekend. The honest way to phase a sports basement is to lock in the infrastructure first, then the surfaces, then the gear. A useful three-stage build looks like this.
- Stage 1, infrastructure: moisture sealing, paint, electrical circuits, lighting, and ventilation. The room already feels like a real space after this stage and can be used for bodyweight work.
- Stage 2, surfaces and protection: flooring, wall padding, mirror, plywood backings. The room is now ready for the chosen sport, even if equipment is still arriving in boxes.
- Stage 3, equipment and storage: rack, mats, bars, hoop, storage systems. Each addition is placed in a zone that has been planned since stage 1.
This order keeps the project usable at every step and avoids the common failure of buying a rack before the floor is level, or hanging a mirror before the wall is sealed.
Budget ranges and where the money actually goes
A real sports basement can be built at several budget levels. The exact numbers depend on the size of the room, the local cost of labor, and the equipment chosen, so the table below is a planning guide rather than a quote.
Indicative budget split for a 200 sq ft basement training space
| Category | Light refresh | Mid-range build | Full conversion |
|---|---|---|---|
| Moisture sealing and paint | Low | Medium | High (full system) |
| Lighting and electrical | Basic fixtures | New circuits, LED grid | Dedicated panel, dimming |
| Ventilation and heating | Portable fan, existing heat | Inline fan, small heater | Mini-split, balanced system |
| Flooring | Foam tiles | Rubber tiles or sport vinyl | Poured surface with underlay |
| Wall padding and mirror | Small panel | Mirror and padding | Full mirror wall, padded zone |
| Core equipment | Mats and bands | Rack, bar, dumbbells | Full rig, bar, mat system, hoop |
| Storage and finish | DIY shelves | Slatwall, rack, cart | Built-in cabinetry |
A useful rule is that infrastructure and surfaces protect the room, while equipment fills it. Cut equipment first if the budget tightens; the wrong flooring or a missed moisture step is far costlier to undo.
Two real-world layouts for different sports
Layouts are easier to read when they are tied to a sport. Two compact plans below cover a gymnastics-leaning basement and a basketball-leaning one. Dimensions assume a roughly 14 by 18 foot room with a 7.5 to 8.5 foot ceiling.
Layout A: gymnastics-first sports basement
- Long wall: a full-height mirror with a 4 by 8 foot panel of wall padding next to it for low-bar work.
- Short wall: a wall-mounted low bar at chest height for adults, with a second bar at kid height for pre-team drills.
- Floor: folding mats laid out as a 12 by 8 foot training strip, with 2 to 3 feet of clear wall around the edge.
- Corner: a soft landing zone, foam pit, or stacked landing mat for new skills.
- Storage: slatwall on the remaining wall for bands, grips, and small gear. A short rack in the opposite corner for a barbell and a few plates used in cross-training.
Layout B: basketball-first sports basement
- Short wall: a wall-mounted or ceiling-supported basketball hoop at 7 to 8 feet for younger players, with a second adjustable rim at 10 feet for adults where ceiling allows.
- Window wall: polycarbonate over the glass, a curtain or roller shade for glare, and a clear 6-foot run-up zone for layups.
- Floor: sealed sport vinyl or smooth rubber for predictable ball bounce, with floor tape marking a free-throw line and a short three-point arc.
- Corner: a ball rack for 4 to 6 balls, plus a small rack for resistance bands and ankle weights used in shooting drills.
- Back wall: a small fold-up weight station that doubles as a flat bench, kept away from the run-up lane.
Both layouts work because the main training motion has a clear run-up, a clear working zone, and a clear exit. A room that is half equipment and half open floor almost always trains better than a room packed wall to wall.
Connecting a home sports basement to real coaching and clubs
A well-built basement is a great supplement to club training, not a replacement for it. A few habits make the most of both.
- Use the basement for reps, not for new skills alone. A coach’s eye on a fresh skill is hard to replace, but the 200th rep of a clean line is exactly what a home mat is for.
- Log the work. A simple wall calendar or a phone note of what was trained in the basement each week turns random play into real progress over a season.
- Mirror club setups where possible. If the local club trains on 4-inch landing mats and 8-foot ceilings, match that at home so athletes transfer cleanly between spaces.
- Keep at least one session a week for the club. A basement that quietly replaces club training usually replaces coaching feedback too, and that is where progress stalls.
For families choosing between a home setup and a club program, a clear-eyed look at goals, budget, and weekly time helps. Many gymnastics clubs publish parent guides that walk through what each level expects, and a practical resource like the parent program guide on California Gymnastics is a useful starting point for that decision. Athletes who train at home and also want a deeper view of how gymnastics shapes other sports can read how skills transfer across football, basketball, and hockey at California Gymnastics.
Common mistakes that cost more to fix than to avoid
A short list of predictable errors shows up in almost every basement build. Avoiding them is cheaper than repairing them.
- Skipping the moisture test. Tape a 2-foot square of plastic to the slab for 48 hours. If it darkens underneath, the slab is wicking moisture and a vapor barrier is non-negotiable.
- Buying the wrong rubber density. Too soft and a rack rolls; too hard and dropped dumbbells crack. Match the durometer rating to the equipment that will sit on it.
- Mounting into drywall alone. A wall-mounted bar, hoop, or TV must hit studs or the plywood backings installed during stage 1.
- Forgetting the door swing. A bar or a rack placed without checking the door arc is the most common reason a finished room feels cramped.
- Overheating the room. A 78 °F basement feels like 85 °F after a warm-up. Cool, dry air is more useful than warm air for most training.
- Ignoring the stairs. Carpeted basement stairs get slippery with chalk and rubber dust. A simple stair tread covers that risk in five minutes.
What a finished sports basement actually feels like
A well-finished sports basement is quieter than expected, brighter than a typical basement, and calmer than a busy gym. The floor feels solid underfoot, the air smells neutral, and the gear is in its place. A young gymnast can warm up alone without a parent hovering, an adult can run a strength session after the kids are in bed, and the same room holds a family stretching session on a Sunday morning. The room earns its keep because it is used often and reset quickly, not because it has the most gear.
Frequently asked questions
What ceiling height do I need for a sports basement?
For general strength training, 7 feet of clear ceiling is workable, with care around overhead lifts. For at-home gymnastics basics, aim for 8 feet as a minimum and 9 feet if possible, so handstands and low saltos have room. For a basketball rim at 10 feet, plan on at least 9 feet of clear ceiling plus reach, which often means a 10-foot slab. Measure under the lowest duct or beam, not under the flat ceiling surface.
Do I need a vapor barrier under a basement gym floor?
Yes, if the slab has ever shown any sign of moisture. Tape a 2-foot square of clear plastic to the floor for 48 hours; if it darkens or sweats underneath, lay a 6-mil polyethylene vapor barrier with taped seams before any foam, rubber, or wood flooring. Skipping this step usually leads to trapped moisture, mold, and a floor that has to come back up within a few years.
What is the best flooring for a gymnastics sports basement?
For most home gymnastics work, 20 to 40 mm closed-cell foam tiles or 8 to 25 mm rubber tiles over a sealed slab give a forgiving, stable surface. Add a folding 4 by 8 foot panel mat for tumbling lines. The exact thickness depends on the skills being trained and the budget, but comfort, moisture tolerance, and the ability to replace a single tile all matter more than the brand name on the box.
Can I install a basketball hoop in a basement safely?
Yes, but the mount has to be solid. Use a wall-mounted or ceiling-supported system that anchors into studs, joists, or engineered backing, not into drywall. Protect nearby windows with polycarbonate, and keep a clear run-up lane of at least 6 feet. A wall-mounted 7 to 8 foot rim is realistic in most basements; a 10-foot rim is only realistic in rooms with at least 9 feet of clear height.
How do I keep a sports basement from feeling cold and damp?
Treat moisture first with a sealer and a vapor barrier. Add an inline supply fan for fresh air and a small electric or low-output gas heater for winter. Keep relative humidity around 50 percent if possible, using a dehumidifier for the wet months. Layer a rubber or foam floor over the slab, and avoid storing paper, fabric, or leather gear directly on the concrete.
How much does it cost to convert a basement into a sports basement?
A small refresh focused on flooring, paint, and basic equipment can come in at the low end of the budget, while a full conversion with new electrical, ventilation, a poured floor, and a full equipment set sits at the top end. Most mid-range projects split their spend across infrastructure, surfaces, and equipment in roughly equal thirds, with the infrastructure stage protecting the room and the equipment stage filling it.
What equipment should I buy first for a multi-use sports basement?
Start with flooring, a mirror, and a folding mat set. Those three items unlock most bodyweight, mobility, and basic gymnastics work. Add a power rack or a wall-mounted bar next, then a small set of adjustable dumbbells. For a basketball-led room, a properly mounted rim and a smooth floor come before any other equipment.
How do I soundproof a basement gym enough for an apartment or shared house?
Focus on the floor first: dense rubber over a foam underlay cuts most impact noise. Add a second layer of drywall with resilient channel on the ceiling to reduce footstep and bar noise upstairs. Use bumper plates and controlled drops instead of slamming weights. Agree on training hours with the rest of the house, and save loud plyometric work for daytime.
Is a sports basement safe for kids to use alone?
It can be, once the room is built with kids in mind. Anchor everything heavy, pad the walls behind any bar or mat, keep a clear zone around equipment, and store small items out of reach of young children. Add a basic first-aid kit and a phone within reach. Even with all of that, most coaches still recommend that new skills are introduced with a coach present, with the basement used for rep work rather than first attempts.
Should I build the basement gym myself or hire help?
Most homeowners can handle painting, rubber or foam tile flooring, storage, and equipment assembly. Electrical, moisture sealing, and any structural anchors for bars, rigs, or hoops are usually better left to a licensed professional. A common approach is to hire out the infrastructure stage and finish the surfaces and equipment stage as a longer DIY project.