Home balance beam practice safety checklist
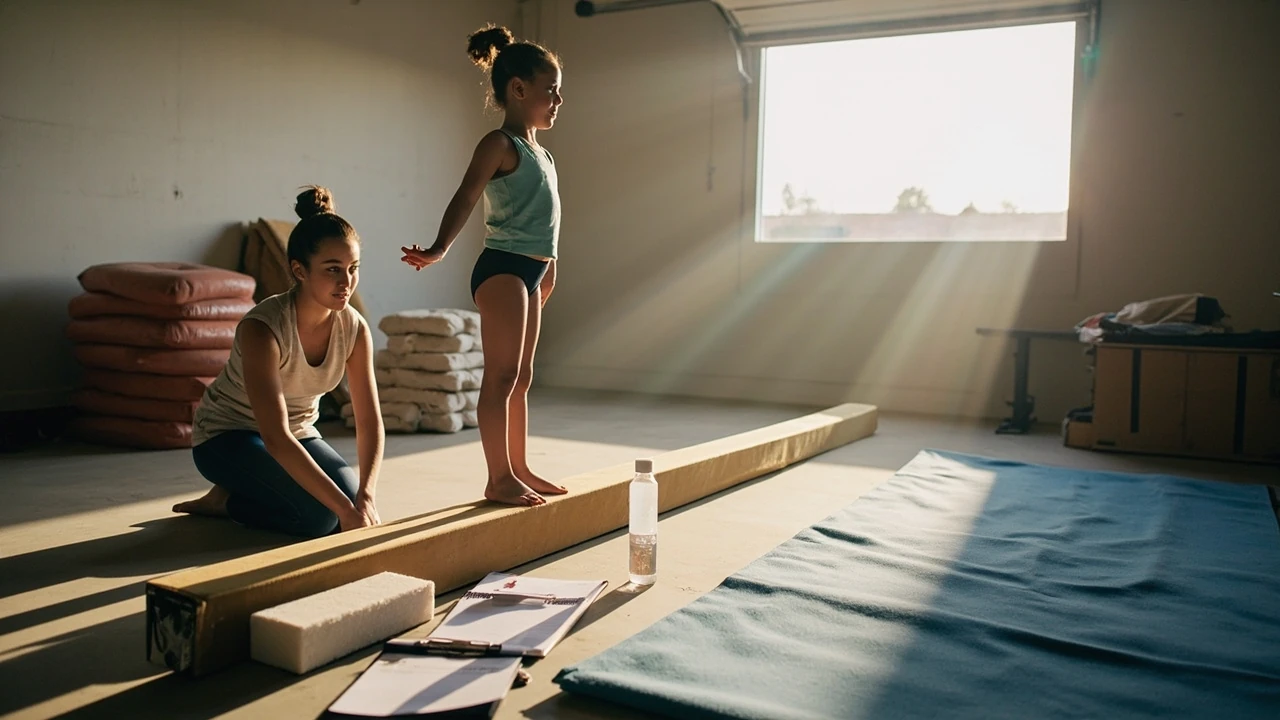
A folded gymnastics mat lies flat on the garage floor. A low training beam sits on top of it, padded at both ends, with a second mat laid lengthwise next to it for bail-out drills. A parent kneels three feet away, hands ready. The athlete is not in a leotard contest, not chasing a level-up, and not filming a TikTok. She is doing the only thing that actually matters on a home beam: practicing the same small skill she already knows, in a space that has been set up to fail safely if anything goes wrong.
This home balance beam practice safety checklist exists because the equipment most families can buy for a garage or basement is not the same as a competition beam, and because the risks on a beam are different from the risks on a floor or vault runway. Falls are vertical. Ankles roll. Wrists take load in awkward positions. The check is not a list of scary things to worry about. It is a list of small, boring decisions that decide whether practice is genuinely productive or a quiet way to build bad habits and injuries.
What follows is the checklist, in the order it actually gets used: before practice, during setup, during the session, and after. It is built around the realistic home setup most gymnasts have access to, not the one in the brochure. Where the right answer is “do this in the gym, not at home,” the article says so plainly.
What a realistic home beam setup actually looks like
Before any safety checklist makes sense, the equipment has to be named honestly. The beam a parent buys on Amazon is almost always a training aid, not a replica competition beam. The first safety decision is knowing which one you have.
| Equipment type | Typical height | Typical surface | Honest use case at home |
|---|---|---|---|
| Floor beam (4-6 in / 10-15 cm) | Ground level | Wood, padded, or suede-covered | First beam skills, walkovers for beginners, drill work for experienced gymnasts |
| Low practice beam (8-16 in / 20-40 cm) | Knee to mid-shin | Suede or vinyl over wood or composite | Connected series, leaps, turns, jumps, dismounts onto a mat |
| Adjustable training beam (16-36 in / 40-90 cm) | Mid-thigh to hip | Suede over a steel or wood core | Conditioning, line drills, get-on dismounts, only with mats and supervision |
| Competition-style beam (approx. 4 ft / 1.25 m) | Hip height | Suede over a sprung or rigid core | Not recommended for unsupervised home use; belongs in a gym |
The shorter the beam, the more drills are available, the more often practice is genuinely useful, and the lower the consequence of a fall. Most productive home sessions happen on a floor beam or a low practice beam. The checklist below assumes that range. If the beam in your home is hip height or above, the session is closer to a gym activity than a home activity, and the supervision rules get stricter.
Home balance beam practice safety checklist: pre-session
Most home practice injuries do not come from a brand new skill. They come from a familiar skill, practiced in a hurry, in a space that has quietly drifted out of safe condition since last week. The pre-session check is the part that prevents that drift.
Check the beam itself
- Run a hand along the top surface. Look for peeling suede, raised edges, splinters, or exposed foam that could catch a foot or skin.
- Look at the underside and the legs or base. A wobbly base is a different safety problem from a slick top, and it usually shows up before the athlete mounts.
- Check that the beam sits flat. Wedge a folded towel or non-slip pad under the low corner if the floor is not level. A 1 cm slope is enough to change landings.
- Confirm the height is appropriate for the skill list today. If the planned work includes anything new, the height should be the lowest setting that still allows the skill.
Check the mat plan
- Place a minimum of one folded panel mat or 4-inch landing mat along the length of the beam where dismounts or falls could happen. A long mat covers more honest mistakes than a square one.
- If the beam is higher than floor level, add a second mat at the end where dismounts land, extending at least 1.5 times the athlete’s height away from the beam.
- Make sure the mat does not create a trip edge. Where mats meet, tape or fold them so feet cannot catch.
- Keep a small landing mat or throw mat free for spotting, not buried under other pads.
Check the room
- Clear a 6-8 foot (about 2 m) run-out on every side of the beam that an athlete could realistically fall toward. Most falls at home are sideways or off the end, not straight down.
- Move hard furniture, exercise bikes, weight racks, and televisions away from the fall zone. If they cannot move, the beam should not be set up that day.
- Lock pets and younger siblings out of the room for the duration of the session. The most common non-injury incident in home gymnastics is a dog walking through a landing.
- Check the floor. Hard tile and bare concrete are the worst surfaces to fall onto. Carpet over a mat is acceptable; concrete is not.
- Set the room temperature. A hot garage is a calf-cramp risk; a cold basement is a tight-ankle risk. Either is fine if the warm-up covers it.
Check the athlete
- Hair tied back. Loose hair catches on suede and on the athlete’s own hands during cartwheels and walkovers.
- No jewelry, no watches, no bracelets. Even small metal pieces can cut a wrist or chip a tooth in a fall.
- Appropriate clothing. Fitted shorts or leggings and a fitted top, or a leotard. Baggy sweatpants catch feet on a beam.
- Bare feet, beam socks with grip soles, or gymnastics slippers only. No treaded athletic shoes, which alter the ankle mechanics in unhelpful ways.
- No practice on a freshly injured ankle, wrist, or shoulder without explicit coach clearance. Pain during a beam series is not something to push through at home.
What to teach before the first skill attempt
A safety checklist only works if the athlete knows the rules it is enforcing. Before the first dismount or leap, three habits should be running on autopilot.
The first is the bail-out. A bail-out is the specific, practiced way of leaving the beam when a skill goes wrong. The classic beginner bail-out is the side sit: hips shift sideways, the athlete sits on the beam with both legs swinging to one side, and the hands come down to the mat if needed. Drilled slowly on a floor beam first, this turns most loss-of-balance events into a controlled shape instead of a fall. It belongs in the warm-up, not in the skill work, so that when the athlete needs it, the body already knows.
The second is the landing position. Knees soft, hips down, chest slightly forward, arms forward and out. Drilled separately on the mat, not on the beam, until it is automatic. A beam landing that is not also a good floor landing is a landing that will eventually roll an ankle.
The third is the stop signal. The athlete should know how to tell a supervising parent or coach to pause without it feeling like quitting. A simple flat hand or a quiet “reset” works. Without this, athletes tend to push through mistakes to keep the session going, and that is where most overuse injuries and minor sprains actually start.
Skills that are usually safe to drill at home
Home practice is best when it is honest about what it is good for. The skills in the table below are the kind that translate well to a short, supervised home session, regardless of whether the athlete is a beginner or an experienced competitive gymnast.
| Skill family | Examples | Why it works at home | Main watch-for |
|---|---|---|---|
| Walks and straight-line drills | Walking in relevé, heel-to-toe walks, walks with arms at specific positions | Builds the line, posture, and foot precision that everything else sits on | Toe-pointing drifting; knees locking instead of soft |
| Jumps and leaps on the beam | Stretches, split leaps, straddle jumps, tuck jumps | Repetitions matter; a low beam reduces fear and increases volume | Under-rotation; landing with a locked knee |
| Turns | Quarter, half, and full turns in passé or squat | Trainable with short sets; balance corrections are easier on a low beam | Falling out early; “stuck” turns without the actual turn |
| Handstands and shapes | Wall handstand, kick-up to handstand against a wall, handstand shapes on the beam | Builds shoulder and core control that beam series require | Banana back, sagging shoulders, bent arms |
| Connectives | Walk-walk-leap, pose-pose-turn, two-skill series | Mimics the rhythm of a routine without the difficulty of new skills | Dropping the chest between skills; rushed transitions |
| Cartwheels and round-offs (floor beam only) | Cartwheel on a line on the floor, round-off onto a mat next to the beam | The beam acts as a visual line, the mat provides the safety | Twisted landings; feet not landing together for round-offs |
The unifying idea is that home practice should build the parts of beam work that need repetition, not the parts that need a coach’s eye for safety. Anything brand new, anything that rotates in the air, and anything that lands on a single leg without a mat is usually better saved for a coached session.
Skills that should stay in the gym
A honest checklist also names what not to bring home. Most home injuries on beam equipment happen in one of these categories.
- Back handsprings, back tucks, and any backward flipping skill. The combination of an unfamiliar rotation, a narrow surface, and a hard home floor is the worst-case setup, and spotting a back flipping skill at home is not a realistic parent job.
- Front aerials, front tucks, and any forward rotating skill not yet consistent in the gym. The reflex to put a hand down on a beam is exactly the reflex that causes wrist and facial injuries.
- Mounts that involve jumping onto the beam from a springboard or from a run, unless the home setup is a sprung floor plus a coach plus a pit.
- Dismounts higher than a straight jump or a leap off the end. Even a small layout off a hip-height beam onto a folded mat is a different category of risk from anything else on this list.
- Anything the athlete is still learning to land on the floor. If a skill is not yet consistent on the floor, a beam is the wrong place to add difficulty.
This list is not a rule against ambition. It is a rule against practicing unrehearsed consequences at home. The same skills, after they are learned in the gym and tested in a controlled setting, can become part of a home session, but only with a coach’s specific sign-off.
Spotting basics for parents and home coaches
Most parents are not trained spotters. That is fine. A non-sporter can still be a useful, safe helper if the rules are narrow and the expectations are honest.
- Stand where the fall is most likely. For most beam skills, that is the side of the beam, not the end. End-of-beam falls are reserved for dismounts.
- Keep one hand near the athlete’s torso, not gripping. The goal is to interrupt a fall, not to lift the athlete. Lifting a rotating athlete into a fall is how spotters get injured.
- Never spot a backward skill on a beam for the first time at home. Even a back walkover is a spotting skill, and a confused grip is worse than no grip.
- Stop the session if the athlete cannot follow the bail-out drill. A tired or distracted gymnast who cannot perform a side sit on command is too tired to safely attempt other skills.
- Keep the spotting role boring. The parent’s job is to be a calm, predictable helper. The athlete should not feel watched like a hawk, and the parent should not be the second coach.
For parents who want to be more involved, the most useful training is a short spotting course at the home gym. Two or three coached sessions on how to spot a cartwheel, a handstand, and a side bail-out is more valuable than any piece of equipment.
Common home beam injuries and what they usually mean
Even with a careful setup, the occasional bruise and rolled ankle is part of training. Knowing which are routine and which are not helps the next session stay safe.
| Injury pattern | Most common cause at home | Likely meaning | Next step |
|---|---|---|---|
| Ankle “roll” with brief pain, no swelling | Off-beam landing on an edge of the mat | Minor lateral ligament strain | Rest 2-3 days, then resume beam work but avoid single-leg landings |
| Ankle swelling, pain on weight-bearing | Off-beam landing onto an uneven surface or with a locked foot | Possible moderate sprain or small avulsion | Skip home sessions, see a clinician, do not push through |
| Wrist pain after a cartwheel or handstand drill | Hand landing on a folded mat edge or the beam’s edge | Possible wrist sprain or early growth-plate irritation in younger athletes | Stop, ice, see a clinician if pain lasts more than two days |
| Bruising along the shin or foot | Beam edge or low corner contact during a leap | Soft tissue bruise, common in early leap work | Pad the beam edge, lower the beam, revisit foot position |
| Back soreness that lingers past a day | Hyperextension drills on a beam without enough core conditioning | Often a sign the skill was attempted before the strength was there | Drop hyperextension drills from home sessions, return to core work |
| Head contact with the beam or floor | Forward rotation onto an unexpected surface, or a missed bail-out | Always treated as significant, even without loss of consciousness | Stop, assess, contact a clinician, no same-day return to practice |
The pattern across this table is that home injuries are usually not dramatic. They are the kind of small, repeatable injuries that build up if the home setup is not checked and the warm-up is not done.
Sample 30-minute home balance beam practice session
A safety checklist works best when it is built into a session plan, not stapled to the end of one. The following structure assumes a low practice beam or floor beam, one folded mat along the beam, one landing mat at the end, and a parent or older sibling available to spot.
- Five-minute general warm-up. Light jog in place, jumping jacks, ankle bounces, arm circles. The point is to raise body temperature and start the joint range of motion.
- Five-minute beam-specific warm-up. Walk across the beam in relevé, walk in passé, walk with a quarter turn, side-sit bail-out drill. Repeat each twice. The bail-out is the most important drill of the warm-up.
- Eight to ten minutes of jump and leap work. Three to five sets of the chosen skill, with full rest between sets. A common mistake is to do too many in a row and let technique drop.
- Eight to ten minutes of connective work or turn work. Build a short two- or three-skill series that already exists in the athlete’s current routine, or one that the coach has asked to be drilled.
- Two-minute landing drill on the mat next to the beam. Stick each landing for three seconds. This is the only drill that should be done to fatigue, because tired landings are the most common injury setup.
- Five-minute cool-down. Light walking, calf and ankle stretches, hip flexor stretch, child pose for the back. End on a flat surface, not on the beam.
If the session runs long, cut the connective work first, then the leap work. The warm-up and the landing drill should be the last things to go, because they are the parts of the session that keep the next session possible.
How this connects to a real meet or routine plan
Home beam sessions are most useful when they reinforce a specific goal. A common mistake is to use home practice as a place to “just work on beam,” which usually means doing the fun skills and skipping the boring ones. The check gets sharper when the home session is connected to the week’s training at the gym. For example, an athlete who has been losing points on a leap series might spend a home session doing five sets of the same leap with a coach-specified correction, then move on. A weekly plan can be sketched in advance, and a small piece of the home plan can be a one-week focus that the gymnast’s coach signs off on.
For a broader look at how a meet week is usually built, the meet preparation walkthrough on this site covers how training cycles are structured around a competition calendar. Pairing that read with a home session plan turns the home beam from a piece of equipment into part of a training system.
Other practical reading
Equipment maintenance and the annual home beam check
A beam that gets used weekly is a piece of sports equipment, not a piece of furniture. It needs a once-a-year look that the weekly check does not cover.
- Re-cover or replace the suede surface if the original is slick, peeling, or showing threads. Suede is the grip surface, and once it is smooth, the athlete’s foot will slip before the body is in position to recover.
- Inspect the legs or the base for hairline cracks. A folded towel under a low corner is fine, but a leg with a crack is a different problem and the beam should be retired from home use.
- Check adjustable hardware for stripped threads. A leg that no longer tightens is a beam that will rock under load, and rocking is one of the more common setup problems on adjustable beams.
- Store the beam flat or on its side, not leaning on one leg. Wood cores warp over time, and a warped beam is not safe even on a low setting.
- Replace any mat that has compressed so much that the surface is below the athlete’s ankle when the beam is on top of it. A 4-inch mat that is now 2 inches thick is no longer doing the work it was bought for.
The suede surface matters more than most people expect. The choice of material, how it is broken in, and how it is cared for are all part of how predictable the beam feels. A beam that is well-maintained is a quieter, more honest piece of equipment than a new one.
What to do after a scare or a real injury
Every home beam will eventually have the moment where a skill goes wrong in a new way. The session after that moment is the most important one for the long-term safety of the home setup. A simple recovery sequence keeps that session from becoming a test of willpower.
- Stop the planned work for the day. Do not “make up” the missed drills the next day, either. A tired athlete is an injury-prone athlete.
- Write down what actually happened, including the time of day, the warm-up, the skill, the mat setup, and the bail-out attempted. The point is not to assign blame. The point is to find which step of the checklist was skipped or which piece of equipment had drifted.
- Adjust the setup before the next session. A new mat, a lower beam, or a stricter warm-up is a normal response, not a sign of failure.
- Loop the coach in. Coaches would rather hear about a home wobble than a home injury. The home setup can be adjusted to mirror the gym’s safety expectations, and the coach can flag any skill that the athlete is not yet ready to repeat at home.
- If a head impact, a wrist that hurts to grip, or a swelling ankle is involved, the next session is medical-clearance-dependent, not bravery-dependent.
Frequently asked questions
What is the safest height for a home balance beam?
For most home sessions, the safest height is a floor beam or a low practice beam at 8-16 inches (about 20-40 cm). The lower the beam, the more drills are usable and the more honest the practice. A beam at hip height or above is closer to gym equipment than home equipment and should be reserved for coached, supervised sessions.
How young is too young for home beam practice?
There is no fixed age, but the practical lower limit is the age at which the athlete can follow a three-step instruction, perform a side-sit bail-out on command, and tolerate a 10-minute focused session. For most children, this is around age 5-6 on a floor beam. Any home session for a child under 5 should be play-based and supervised within arm’s reach, and should not include beam-specific drills beyond walking and jumping in place.
Do I need a coach present for every home beam session?
Not a coach, but a qualified spotter. For beginner skills on a floor or low beam, a parent or older gymnast who has been trained on a few specific spotting cues is usually enough. For any new skill, any backward skill, or any dismount above a straight jump, a coach’s presence is the safer choice. The home session is a place to repeat known skills, not a place to introduce them.
What kind of mat works best under a home beam?
A 4-inch (about 10 cm) folding panel mat or a 4-inch landing mat along the length of the beam is the minimum. A second mat at the end of the beam is useful for dismounts. A thinner yoga mat or a foam floor tile is not a substitute. The mat should extend at least one body length on the side where most falls happen.
Can beam socks replace bare feet for home practice?
Beam socks with grip soles are a reasonable alternative for athletes whose feet get cold or whose skin reacts to the suede. They change the feel of the beam slightly and usually require a short adjustment period. Socks without grip, regular cotton socks, and treaded shoes are not appropriate for beam work, because they alter the foot’s contact and the ankle’s range of motion.
How often should a home balance beam practice happen?
For most gymnasts, two to four short home sessions per week is more useful than one long session. Sessions of 20-40 minutes, with a proper warm-up and cool-down, build skill without the overuse injuries that come from fatigue. Home practice should support the gym schedule, not replace it.
What should I do if my child is scared of the beam at home?
Lower the beam, reduce the skills, and rebuild the warm-up. Fear is information, not a problem to push through. The first session back should be a walking-only session on a floor beam with a heavy mat under it. Confidence usually returns faster than expected when the setup is honest and the bail-out is drilled.
Are balance beam practice bars or folding beams safe for home use?
Some folding beams are well-designed, with non-slip bases and stable joints. The test is the wobble check: if the beam rocks when a 30-pound weight is set on one end, it is not stable enough for athlete use, even at low height. Fixed-leg beams with wide bases are usually safer than narrow, folding-frame designs.
Is it safe to film beam practice at home?
Filming is fine if the phone is mounted and the session plan does not change because of the camera. Filming that adds jumps for content, encourages “one more try” beyond the plan, or that requires a person to operate the phone at the same time as spot is a safety problem, not a filming problem.
What is the single most important piece of the home balance beam practice safety checklist?
The mat plan. Most home injuries happen because the mat was not right for the skill. A beam that is too high can be lowered, a skill that is too new can be skipped, a coach who is not there can be on a video call, but a mat that is not in the right place cannot be fixed after the fall. The 30 seconds spent placing the mat is the most valuable 30 seconds of any home session.