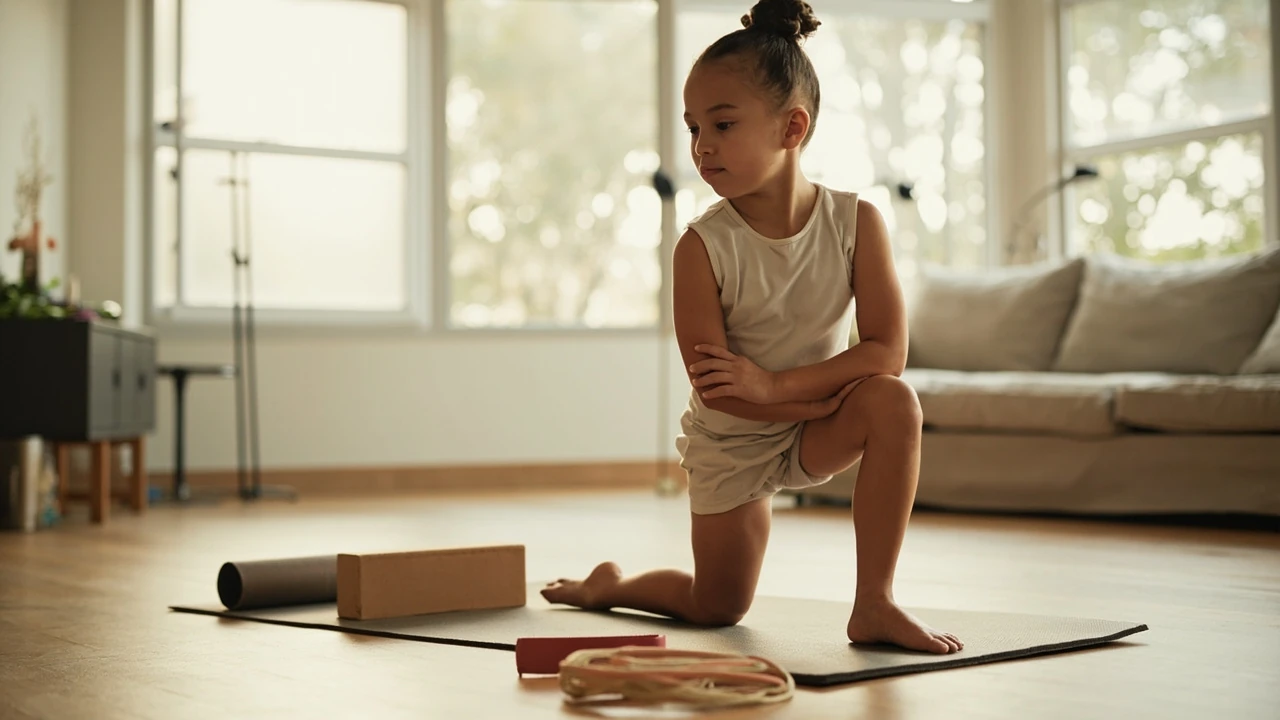
Gymnastics warm up checklist before home practice: a practical routine
You have cleared the coffee table, rolled out the mat, and set the timer for forty-five minutes. The phone is on silent, the dog is out of the room, and the only thing standing between you and a productive session is the next ten minutes. A reliable gymnastics warm up checklist before home practice turns those ten minutes into a controlled sequence rather than a hopeful guess, and it protects the joints that take the most abuse in a living-room session.
Home practice is different from a club warm up in three ways. The space is smaller, the equipment is limited, and there is usually no coach watching the first drill of the day. That combination is exactly why the warm up matters more at home, not less. A short, well-ordered sequence raises tissue temperature, opens the range of motion the skills actually need, and gives the brain a chance to switch from “household mode” to “training mode” before any real loading begins.
This guide gives you a single, ordered checklist you can run on any weekday. It works for gymnasts who already train at a club and want a focused home session, for adults returning to the sport, and for parents supervising a child through a living-room practice. Every step explains why it is in the sequence, not just what to do, so you can adjust it as your space and your goals change.
Why the home warm up deserves its own checklist
A home practice is built around a smaller set of movements than a full gym session. You are not doing double backs, you are doing handstands against a wall, drills on the floor, shape work, and conditioning. That sounds safer, but the home environment hides its own risks: cold carpet, no spring floor, lower ceilings, and distractions that break concentration. A warm up designed for a club apparatus rotation does not fit that picture.
A targeted checklist for the home session does three things at once. It raises core temperature enough to make connective tissue behave predictably, it primes the specific joints you will load (wrists, shoulders, ankles, hips, and the lower back), and it gives you a mental gate. The mental gate is underrated: stepping through the same sequence at the start of every session trains your nervous system to recognise “we are training now”, which is useful when the session is twenty minutes long and the sofa is six feet away.
The second reason to keep a separate home checklist is recovery. Most home sessions are added on top of regular club training, school sport, or adult work. The body may already be warm from a previous activity, or it may be genuinely cold after a long desk day. The checklist below is written to be safe in both states, because it starts from the joints and works outward rather than starting with the heart rate.
The full checklist, in order
Use the list below as a single pass. Each block has a purpose and a rough time. A complete warm up for a forty-five minute home practice should sit between twelve and eighteen minutes, depending on the temperature of the room and how you feel on the day.
- Room and body check (1-2 minutes)
- Joint mobility sequence (3-4 minutes)
- Pulse raiser (2-3 minutes)
- Activation drills (2-3 minutes)
- Dynamic flexibility and skill prep (3-5 minutes)
- First skill of the day, performed slowly (1-2 minutes)
The order is deliberate. Mobility before pulse, activation before stretching, skill prep before the skill. Reversing those pairs is one of the most common reasons a home session starts with a pulled muscle or a tweaked wrist.
Step 1: Room and body check
Before any movement, spend sixty seconds looking at the space and scanning your own body. The room check is short but it prevents the most embarrassing injuries: stepping onto a folded mat edge, rolling an ankle on a stray LEGO, or landing a handstand with one hand on a rug that slides.
- Move anything that can slide, roll, or crumple out of the practice footprint.
- Confirm the mat is fully unfolded and the edges are flat.
- Wipe the floor if a previous session left chalk or sweat; both are slippery on a handstand landing.
- Place any small equipment (block, band, foam roller) where you can reach it without standing up.
- Set a water bottle at the edge of the mat, not in the middle.
The body scan is equally quick. Note any joint that feels stiff today, any muscle that is sore from a previous session, and how rested you actually feel. If something is genuinely off, the warm up will not fix it. Adjust the session downward rather than pushing through a sharp or sudden pain. The warm up below assumes a normal, slightly tired body, not a body that needs a different kind of day.
Step 2: Joint mobility sequence
Mobility is the foundation of the home warm up because the joints most stressed in a living-room session (wrists, shoulders, ankles, thoracic spine, and hips) are also the joints that lose range fastest when the body is cold. Spend three to four minutes moving each joint through its full pain-free range, with light pressure, not aggressive stretching.
Wrists and fingers
Gymnastics loads the wrist more than almost any other joint in the home. Floor work, handstands, cartwheels, and even some core drills all push through the palm. A cold wrist on a hard carpet is a recipe for a sprain.
- Knuckle push-ups on a folded mat, 8-10 slow reps.
- Wrist circles, 5 each direction, keeping the palm flat on the floor.
- Fingertip taps, 10 per hand, pressing each finger into the mat one at a time.
- Front support rocks, 10 small shifts forward and back, hand flat.
Shoulders and scapula
The shoulder is built for movement, but only after it has been moved. A few slow reps of scapular control and shoulder rotation prepare it for handstand and support work.
- Scapular push-ups in a front support, 8 reps.
- Arm circles forward and backward, 10 each direction, starting small and growing.
- Thread the needle on all fours, 5 per side, opening the upper back.
- Wall slides, 8 reps, keeping the lower back quiet.
Thoracic spine
The mid-back is what allows the shoulders to sit in a safe position overhead. A stiff thoracic spine will dump the load into the lower back during every handstand and every bridge.
- Cat-cow on all fours, 8 slow reps, breathing out at the top of the arch.
- Thread the needle (also counted above) covers rotation.
- Quadruped t-spine rotations, 5 per side, elbow to ceiling.
Hips
Hips need to extend for handstands, split for leaps, and rotate for turns. A short hip block clears the morning stiffness without pulling anything.
- 90/90 hip switches, 6 per side, slow and controlled.
- Cossack squats, 5 per side, only as deep as the ankles allow.
- Active straight-leg raises, 6 per leg, moving the leg with control rather than momentum.
Ankles and feet
The ankle is the joint that decides whether a landing is safe. A few minutes here pays for itself across the whole session.
- Ankle circles, 5 each direction, both feet.
- Tibial raises against a wall, 10 reps, holding the knee over the toes.
- Calf rocks on a step or the edge of the mat, 10 per leg.
Step 3: Pulse raiser
With the joints awake, the next job is to raise the heart rate and warm the muscles. The goal is a light sweat and a breathing rate that is faster than resting, not a hard effort. Two to three minutes is enough for a home session.
- Marching on the spot with high knees for 30 seconds.
- Skipping in place for 30 seconds; lower impact stepping is fine if the ceiling is low.
- Lateral shuffles across the mat for 30 seconds each way.
- Star jumps or tuck jumps for 30 seconds, only if the ceiling and floor allow.
Pick two or three of the options rather than running through all of them. The pulse raiser should feel boring, not exhausting. If you are breathing through your mouth, you have gone too far for a warm up.
Step 4: Activation drills
Activation is the step that separates a generic warm up from a gymnastics warm up. The job here is to wake up the specific muscles that protect the joints during skills, before any real load arrives. These are low-rep, focused drills, not a strength workout.
Core and trunk
- Dead bugs, 6 per side, slow and with the lower back pressed into the mat.
- Bird dogs, 6 per side, no hip rotation.
- Hollow body rocks, 6-8 reps, with the lower back glued to the mat.
Glutes and hip stabilisers
- Glute bridges, 10 reps, pausing at the top for one second.
- Side-lying clamshells, 8 per side, with a band if you have one.
- Single-leg balance, 20 seconds per side, knee soft.
Shoulder and scapular control
- Prone Y-T-W raises, 5 each letter, light weight or no weight.
- Wall angels, 8 reps, keeping the elbows and wrists in contact with the wall.
Step 5: Dynamic flexibility and skill prep
This is the part most people call “stretching”, but the purpose is preparation, not flexibility for its own sake. Every drill should look like a slower or smaller version of a skill you will do in the next block. Aim for three to five minutes total and stop while the muscles still feel strong.
Lower body
- Walking lunges with a torso twist, 6 per side, to open the hips and warm the groin.
- Leg swings front-to-back and side-to-side, 10 per leg, holding a wall or door frame.
- Deep squat hold, 30-45 seconds, heels down if possible.
Upper body and midline
- Walk-outs to plank, 5 reps, moving slowly through the shoulders.
- Inchworms, 5 reps, with a flat back and a small toe press at the top.
- Downward dog pedal-outs, 6 per side, opening the calves and hamstrings.
Step 6: First skill, performed slowly
End the warm up by performing the first real skill of the day at half speed. For most home sessions this is a handstand against the wall, a tabletop shape, or a low bridge. The point is to give the nervous system an honest signal that the body is in training mode, not to chase a rep. One or two clean, slow reps are enough.
After this, the warm up is done. The session proper can begin, and you will find that skills feel more controlled, balance is easier, and the joints that usually complain at the start of a session stay quiet for longer.
How long the warm up should take in different sessions
Time is the variable that decides whether a checklist is actually used. Below is a simple table that maps session length to warm up length and to which steps can be trimmed if you are in a hurry.
| Session type | Session length | Recommended warm up | What to keep if short on time |
|---|---|---|---|
| Quick skill touch-up | 20 minutes | 8-10 minutes | Mobility + activation + first skill |
| Standard home practice | 45 minutes | 12-15 minutes | Full checklist |
| Long conditioning block | 60-75 minutes | 15-18 minutes | Full checklist + an extra pulse raiser set |
| Recovery or mobility day | 30 minutes | 20-25 minutes (mobility-focused) | Joint mobility + dynamic flexibility, no pulse raiser |
The “keep if short on time” column is the real safety net. If life cuts the session to twenty minutes, you still want wrists, shoulders, hips, ankles, core, and a slow first skill. That is non-negotiable; everything else is a bonus.
Adjusting the checklist for different home situations
The checklist above is written for a living room with one mat and a clear wall. Real homes vary. Below are the most common adjustments gymnasts actually use, and why they help.
Low ceilings
If you cannot stand fully upright under a light fixture, swap the pulse raiser star jumps for fast marching or step-ups on a sturdy box. The goal is to raise the heart rate, not to leave the floor. Keep handstand work to a wall handstand with a soft landing surface in case the line of the handstand passes the ceiling.
Hard floors
Carpet over concrete is more common than a sprung floor. Add an extra mat layer for any landing drill, and use a folded towel under the palms for knuckle push-ups if the wrist feels compressed. The wrist mobility block also benefits from a small wedge under the heel of the hand, although a folded washcloth works just as well.
Shared space
You are unlikely to be alone in the room for the whole session. Use the room and body check at the start of the session to agree a “no walk through” zone with anyone else in the home, and rehearse the same rule before any handstand that ends in a forward roll. A two-minute conversation prevents an awkward ankle.
Limited equipment
Most of the checklist needs nothing but the mat. A resistance band, a foam roller, a yoga block, and a folded towel cover the rest. If you have none of those, replace banded clamshells with bodyweight side steps, foam rolling with extra cat-cow reps, and block-supported lunges with a front foot elevated on a stack of books.
Cold or hot rooms
A cold room needs an extra minute on the pulse raiser and a slower transition into dynamic flexibility. A hot room needs the same warm up but with a water break between the activation block and the dynamic flexibility block, because dehydration stiffens tissue faster than people expect.
Common warm up mistakes in a home setting
Most home warm ups go wrong in the same handful of ways. Spotting them early is easier than fixing them after an injury.
- Starting with static stretching. Holding a stretch for thirty seconds before any movement lengthens the muscle but does not warm it. Save long holds for the end of the session.
- Skipping the wrists. The wrist is the joint that gets the least attention in a general warm up and the most load in a gymnastics session.
- Going too hard on the pulse raiser. A warm up that leaves you breathing through your mouth has already borrowed from the main session.
- Forgetting the mental gate. A warm up that races through the steps gives the body a workout but does not give the brain a transition.
- Warming up on a slippery surface. A rug that moves under a handstand landing turns a warm up into a hospital trip.
- Stopping after the pulse raiser. A sweaty body is not yet an activated body. The activation block is the one most often dropped at home.
A printable one-page version
For gymnasts who like a physical list on the wall, the following compressed version fits on a single sheet. Print it, stick it near the mat, and tick each block as you finish it.
| Block | Time | Key drills |
|---|---|---|
| Room and body check | 1-2 min | Clear floor, scan joints, set water |
| Joint mobility | 3-4 min | Wrists, shoulders, t-spine, hips, ankles |
| Pulse raiser | 2-3 min | March, skip, shuffle, jump |
| Activation | 2-3 min | Core, glutes, scapula |
| Dynamic flexibility | 3-5 min | Lunges, swings, walk-outs |
| First skill, slow | 1-2 min | Handstand, shape, or bridge |
Pairing the warm up with the rest of the session
A warm up does not exist in isolation. The drills you choose for the main block should logically follow the checklist above. If the warm up has emphasised the shoulders and the upper back, lead the main block with handstand shapes. If the warm up has emphasised the hips, lead with split work and turns. Matching the warm up to the session is one of the simplest ways to make a home practice feel like a real training session rather than a collection of drills.
For gymnasts who also train at a club, a home practice works best as a complement, not a replacement. Keep the home warm up gentle enough that the body can still train hard in the next club session, and avoid doing heavy plyometrics on a hard floor the day before a full apparatus rotation. If you want ideas for the main block, our guide to the artistic gymnastics apparatus explains what each piece of equipment trains and which drills transfer well to a mat at home.
For clubs setting up home programming for their athletes, a shared checklist makes remote coaching much easier. A coach can tell a gymnast “run the standard checklist, then show me your handstand” instead of writing a separate warm up for every session. Clubs that want to support that kind of structure can also think about how their online presence helps athletes follow the plan, which is covered in our piece on how gymnastics clubs can build a stronger online presence.
Frequently asked questions
How long should a gymnastics warm up before home practice take?
Most home sessions are warmed up in twelve to fifteen minutes, with a minimum useful warm up of about eight minutes on a tight schedule. A longer recovery or mobility session can spend twenty to twenty-five minutes on the warm up block alone, but the working session that follows will be shorter as a result.
Can I skip the warm up if I already trained at the gym today?
Not entirely, but you can shorten it. A short mobility sweep, a one-minute pulse raiser, activation of the main muscle groups you will load, and a slow first skill are still required. Going straight into skill work on a body that has been sitting for two hours since the last session is a common cause of joint sprains.
What if my home floor is hard?
Use a double mat for any drill that ends with the hands or the head on the floor, and consider a folded towel under the palms for knuckle push-ups and handstand work. The wrist mobility block in particular benefits from a softer surface or a small wedge under the heel of the hand.
Is static stretching a good warm up for home gymnastics practice?
No. Static stretching belongs at the end of a session, not the start. A cold muscle that is held in a long stretch can lose force output for fifteen to thirty minutes, which is the opposite of what a warm up should do. Use dynamic drills instead, and save long holds for the cool down.
What is the single most important part of the warm up?
For most home sessions it is the wrist and shoulder mobility block, because those joints take the most load during handstands and floor work. Skipping the rest of the warm up costs you some power, but skipping the wrist and shoulder work costs you safety.
How do I know if I have warmed up enough?
You should have a light sweat, a breathing rate that is faster than resting, full and pain-free movement at the wrists, shoulders, hips, and ankles, and the ability to hold a hollow shape without shaking. If any of those are missing, repeat the closest block before moving on.
Can children follow the same checklist?
Yes, with two adjustments. Cut the time of each block roughly in half, and turn the activation drills into a game (for example, “freeze in a hollow shape when I clap”). Children warm up faster than adults and lose interest faster, so the warm up should be efficient and engaging rather than long.
Should I do this warm up on rest days?
On a true rest day, no. On a recovery or mobility day, run only the joint mobility and dynamic flexibility blocks, skip the pulse raiser, and treat the session as a slow movement session. It is a useful way to keep range of motion without adding load.
Where can I learn more about the skills the warm up prepares the body for?
Our overview of gymnastics explains the structure of the sport and the main events, and a closer look at the equipment used in each event is in our artistic gymnastics apparatus guide. Together, those two references give context for why each part of the warm up matters.
What if I only have ten minutes before practice?
Run the room check, the joint mobility block, a one-minute pulse raiser, and the first slow skill. Drop activation and dynamic flexibility, but do not drop the first slow skill. It is the drill that gives the nervous system the clearest signal that the session has started.