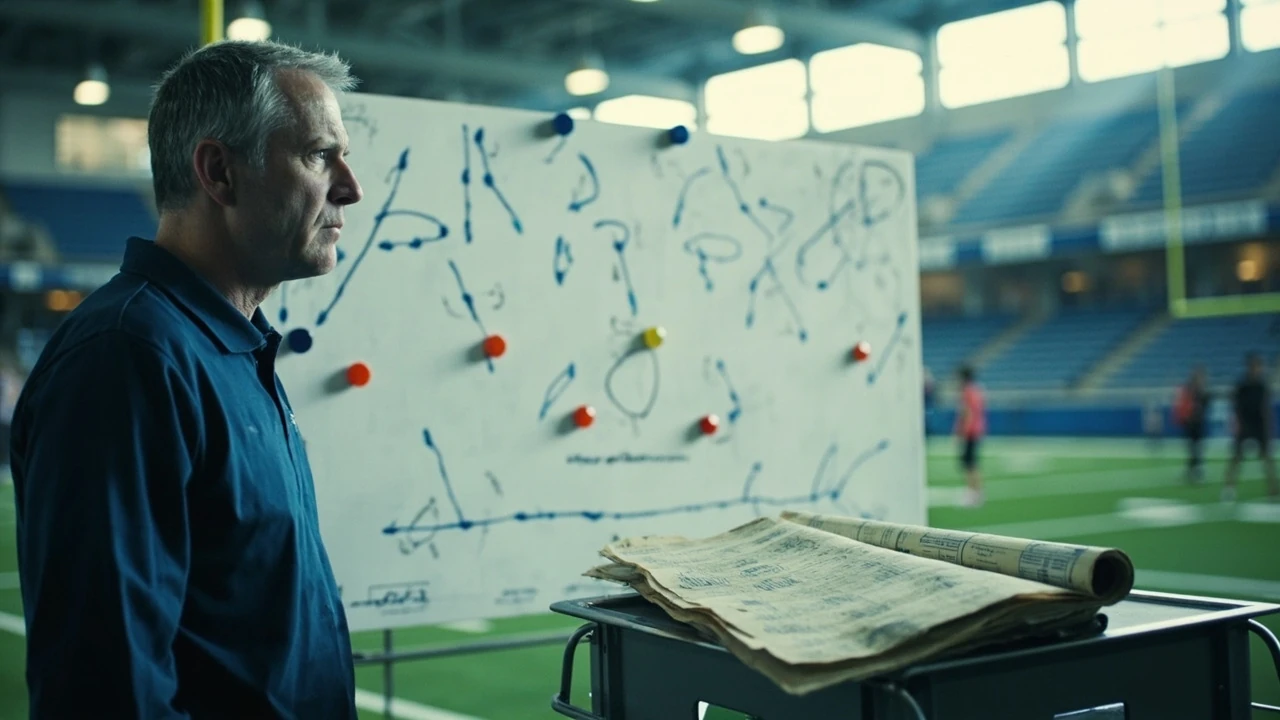
A football drawing starts on a sideline whiteboard during a timeout, in a quarterback’s notebook between series, or on a kid’s bedroom wall next to a poster of the team. The skill sits in an interesting place: it is part art, part coaching language, part practice habit. The reason people search for it is rarely because they want to be a professional illustrator. They want to communicate a play, remember a route, or teach someone else how the game works on paper.
This guide treats football drawing as a practical skill. It covers the equipment, the basic field and formation symbols, the route trees, the defensive fronts, and the small habits that turn a messy sketch into a clear diagram. It also walks through how coaches build play sheets, how players can keep their own note systems, and how teachers and parents can use football drawings to explain strategy to younger audiences. By the end, you should be able to sit down with a marker and draw a readable play, fix your own mistakes, and recognize the symbols used at the professional level.
Football drawing essentials: what you need before you sketch
Before worrying about artistic technique, the tools matter. Most football drawings fall into two broad categories: sideline diagrams meant to be wiped clean in a few plays, and reference sketches meant to be kept for study. The tool set is similar for both, but the mindset is different.
- Whiteboard or large paper: A sideline board should be 36 by 24 inches at minimum, with a clear yard-line grid. For paper work, a 14 by 11 inch sketchbook or letter-size printer paper works fine.
- Markers in three colors: Black for offensive players and labels, blue or red for defensive players, and a third color for the ball, the quarterback, or motion arrows. Coaches often avoid green because it disappears on grass backgrounds.
- Stencils: A simple offense and defense stencil with circles, X’s, squares, and a football shape speeds up the work and keeps your symbols consistent across the season.
- Pre-printed field templates: Many coaches use laminated field sheets so the yard lines and hash marks are already in place. This removes the most common error: drawing a field that is not proportional.
- A small notebook: Players who sketch their own assignments benefit from a pocket-sized book they can review in the film room or on the bus.
Pencil is useful for layout and for sketching changes before you commit to ink. Erasers help when you are working on paper, but on a whiteboard the only real fix is a damp cloth. Most coaches keep a microfiber towel in their back pocket for exactly that reason.
Building a clean field template for football drawing
The single biggest mistake beginners make is a distorted field. A real football field is 120 yards long from back of end zone to back of end zone, and 53 1/3 yards wide. When you draw it, you do not need to be exact, but the proportions have to be close. Otherwise routes look shorter or longer than they are, and the diagram will mislead a player reading it.
Start by drawing two long horizontal lines that represent the sidelines. The visible playing field between the goal lines is 100 yards, and the total drawn area including end zones is 120 yards. A comfortable aspect ratio for a sketch is 6 to 1, meaning the field is six times longer than it is wide. If you draw your sidelines 12 inches long, your field should be 2 inches from sideline to sideline.
Mark the goal lines and the two end zones first, then the 50-yard line in the middle, then the two 40-yard lines, and finally the 20s, 30s, and 10s. Add hash marks at the center of the field, spaced five yards apart, as small vertical lines. The hash marks matter because most plays are described relative to them, not to the sidelines.
| Element | Real measurement | Drawing proportion (12 inch long field) |
|---|---|---|
| Total length with end zones | 120 yards | 12 inches end to end |
| Playing field between goal lines | 100 yards | 10 inches |
| Field width | 53 1/3 yards | 2 inches sideline to sideline |
| End zone depth | 10 yards each | 1 inch each |
| Hash mark spacing | 5 yards | 0.5 inch intervals |
Once the field is laid out, label it with letters on the bottom side and numbers on the side, or vice versa. Real play sheets use A through G as the yard lines on the sideline and 1 through 9 as the hash positions. The exact system is not as important as using it the same way every time. Consistency is what makes a diagram readable at speed.
Offensive symbols every football drawing needs
The offensive symbols used in football drawing come from a long tradition in coaching manuals. They are designed so that a single glance tells a player who has the ball, who is on the line, who is in the backfield, and who is eligible to catch a pass.
- Circle (O): The center, the player who snaps the ball. He is always on the line of scrimmage.
- Triangle or filled square: The quarterback. The triangle points in the direction he is expected to face after the snap.
- Open circle: Running backs and receivers. The position on the diagram shows whether the player is in the backfield or split out wide.
- Underline or “X”: In some systems, an X is used for an eligible receiver, an O for a running back, and a QB for the quarterback. Pick one convention and stick with it.
- Solid line: The line of scrimmage. Every offensive lineman stands on it, even though the diagram may only show three or four interior players to keep the sketch readable.
Labeling positions is a small habit with a big payoff. Instead of drawing a blank circle for the left tackle, write “LT” inside it. The label costs you two seconds of drawing time and saves your quarterback from having to count linemen during a noisy game.
Defensive symbols and how to show movement
Defensive diagrams are usually drawn in a different color from the offense, often blue or red. The symbols vary by system, but the structure is similar. A front refers to the defensive linemen, a coverage refers to the defensive backs, and the linebackers sit between them.
- Square or “B”: A defensive lineman or linebacker, depending on where it is placed on the field.
- Triangle pointing toward the offense: A defensive back. The point faces the quarterback so the player knows who is being defended.
- Wavy line or “CB”: A cornerback, often shown in man coverage with a short line connecting to the receiver he is following.
- “FS” and “SS”: Free safety and strong safety, drawn deeper than the linebackers and usually on the side of the strong run threat.
Movement is shown with arrows. A solid arrow is a route the player will run with the ball in his hands. A dashed arrow is a pass route. A double arrow means a player has read the defense and can choose either direction. Short T-bars at the end of an arrow mean the player will block at that point rather than continue running.
| Notation | Meaning | When to use it |
|---|---|---|
| Solid arrow | Run path with the ball | Running back carries, quarterback scrambles, jet sweeps |
| Dashed arrow | Pass route | Receiver patterns, crossing routes, post routes |
| Curved dashed line | Option or choice route | Read progressions, run-pass option plays |
| Short T-bar | Block assignment | Receiver stays in to block a defender |
| X over a player | Defender blitzes | Pass rush tags, fire zones, all-out pressure |
How to draw a basic offensive play step by step
Once the symbols are second nature, a play can be drawn in under a minute. The trick is to work from the inside out: the line, then the quarterback, then the backs, then the receivers, then the routes. Drawing in that order prevents the common error of placing a receiver in a spot that no route can actually start from.
- Draw the line of scrimmage. A horizontal line across the middle of your field, with a small arrowhead or “LOS” label so the direction of the offense is obvious.
- Place the offensive line. Five circles in a row, with the center slightly lower if you want to show he is snapping the ball. Label the tackles and guards if you have room.
- Put the quarterback behind the center. About five yards deep, marked with a triangle or “QB.”
- Add the backfield. A running back or fullback about six to seven yards deep in the backfield, usually offset from the quarterback. Two-back sets place another back beside the first.
- Draw the receivers. Split ends, flanker, and slot receivers are placed outside the numbers or in the slot area. Label them with their jersey number or position.
- Mark the ball. A small football shape at the center, pointing in the direction of the offense.
- Draw the routes. From each eligible receiver, draw a dashed line for the pass route, ending in a small arrowhead. The shape of the line tells the route name.
- Add blocking assignments. For running plays, draw a short line from each blocker to the defender he is responsible for. Keep these lines simple so the play stays readable.
- Label the play. Most coaches write the play name, the formation, and the snap count in a corner of the diagram so the team can find it later.
If you are drawing for a player who is not yet familiar with the system, avoid clutter. A clean diagram with one or two pieces of information per player will communicate more than a busy diagram with every read and progression on it. Save the detail for the install period when there is time to sit and study.
Drawing defensive fronts and coverages
Defensive diagrams follow a similar logic. A front is the alignment of the defensive linemen, and a coverage is the responsibility of the defensive backs. Coaches usually draw the front first and the coverage second, because the front is what the offensive line will see and react to on the snap.
A 4-3 front has four down linemen and three linebackers. A 3-4 front has three down linemen and four linebackers. An even front aligns the linemen across from the offensive tackles, while an odd front puts a lineman head-up on the center. Each variation is drawn as a slightly different arrangement of squares or B’s, but the names matter more than the drawings once the players know the system.
For coverages, the most common ones to draw are Cover 1, Cover 2, Cover 3, and Cover 4. Cover 1 has one deep safety and man coverage underneath. Cover 2 has two deep safeties, each covering a half of the field. Cover 3 has three deep defenders, with the corners and one safety each taking a third. Cover 4 splits the deep field into quarters, with each corner and safety responsible for a quarter. A two-word label on the diagram, like “Cover 3,” is usually enough to remind the secondary what they are doing.
| Name | Front alignment | Coverage | Common situation |
|---|---|---|---|
| 4-3 Under | 4 down, 3 linebackers, strong-side end aligned inside the tight end | Cover 1 or Cover 3 | Base defense against 11 personnel |
| 3-4 Odd | 3 down, 4 linebackers, nose on the center | Cover 2 or Cover 3 | Run-stopping base |
| Nickel | 4 down, 2 linebackers, 5 defensive backs | Cover 4 or Cover 2 | Obvious passing down |
| Dime | 4 down, 1 linebacker, 6 defensive backs | Cover 3 or Cover 1 | Long yardage, two-minute drill |
Drawing route trees the way coaches actually teach them
A route tree is the family of routes a receiver can run from a given alignment. In football drawing, the route tree is usually drawn from a single receiver position, with all of the routes fanning out in different directions. This makes it easy to compare patterns and to see at a glance which routes attack which zones of the defense.
The standard pass routes have short names that show up on the diagram as the shape of the line. A hitch is a short straight line, five or six yards, with a small turn back toward the quarterback. An out breaks at a 90-degree angle toward the sideline. A corner breaks at a 45-degree angle up the sideline. A post breaks at a 45-degree angle toward the goal post. A go is a straight line as deep as the receiver can run.
- Hitch or quick out: Short stem, sharp turn back to the quarterback. Best against off coverage.
- Slant: Short stem, then a sharp 45-degree break inside. Beats press-man coverage when the corner is leaning outside.
- Out route: Six- to eight-yard stem, then a 90-degree break to the sideline. Classic against zone defenses with the sideline as a boundary.
- Corner or flag: Twelve- to fifteen-yard stem, then a 45-degree break toward the sideline. Attacks the deep outside zone.
- Post: Twelve- to fifteen-yard stem, then a 45-degree break inside toward the goal post. Attacks the deep middle of the field.
- Go or fade: Straight vertical stem. Best against single coverage and in the red zone.
- Cross: A long route that starts outside and crosses the formation. Used to clear out zone defenders.
When you draw a route tree, keep the stems to scale. A 12-yard in-route should look longer than a 6-yard hitch on the diagram. Real coaches are ruthless about this, because a route that looks too short on paper is more likely to be cut short on the field.
Football drawing for player note systems
Players at every level benefit from keeping their own notes, and football drawing is the foundation of those notes. A linebacker might draw a coverage diagram with his own key reads on it. A quarterback might draw a progression with a number for each receiver in the read order. A receiver might draw the stem and break points of his own routes and the landmarks he should reach at each step.
The point is not to draw a coach-quality diagram. The point is to commit the picture to memory. Studies of motor learning consistently show that producing a sketch, even a rough one, helps a learner recall the underlying pattern more accurately than reading the same information passively. A receiver who draws his own route tree, even badly, is more likely to remember the break points in a game.
A simple player notebook can be organized in three sections. The first section is the route tree, with each route drawn once and labeled. The second section is the formation book, with the offensive formation drawn and the receiver’s own alignment in it. The third section is the play list, with the player’s assignments in each play, drawn schematically rather than written out as prose.
How coaches build a season of play diagrams
At the team level, football drawing is a documentation problem as much as a teaching problem. A high school program might run 60 to 80 plays in a season, and a college program might run 200 or more. Without a system, the diagrams pile up in random notebooks and the staff wastes hours each week searching for the right play.
Most programs use a numbered system. Each play is given a two-digit number. The first digit is the formation, and the second is the play concept. For example, 12 could mean 11 personnel, run concept 2. A three-digit name like “12-Zip” or “12-Forte” is added in words so the players can call it audibly. The diagram itself is filed under the same number in a binder, sorted by formation so the offensive coordinator can find a play quickly.
Modern programs digitize this with a tablet, but the underlying skill is the same. A coach has to be able to sketch a play clearly in under a minute, and the team has to be able to read it the same way every time. The tool is less important than the discipline of using it the same way.
Common mistakes that ruin a football drawing
Even experienced coaches slip into bad habits. Most of the worst diagrams in any team room share a small set of common problems, and once you can see them, you can avoid them.
- Distorted field proportions: A field that is too narrow makes the routes look compressed, and a field that is too tall makes the formation look spread out. Aim for the 6 to 1 ratio and the diagram will read correctly.
- Too many colors: Three colors is enough. Adding a fourth or fifth color for special situations makes the diagram look like a coloring book and forces the reader to learn a private code.
- Crowded line of scrimmage: Drawing all five offensive linemen with labels is a waste of space. The players know who they are. Save the labels for the skill positions.
- Unlabeled players: The opposite mistake. Every eligible receiver should be labeled with a position or number, because the diagram is useless if a player has to guess who is who.
- Arrows that are not arrows: A line without an arrowhead does not tell the reader which way the player is moving. Always finish a route line with a small arrowhead, even if it is tiny.
- Missing ball direction: A diagram without a clear indication of which way the offense is facing is hard to read. Add a single arrowhead at the top of the field to mark the direction of the play.
- Last-minute additions: Drawing a quick option or a sight adjust on top of an existing play makes the diagram confusing. Erase the line and redraw it cleanly rather than stacking corrections.
Teaching football drawing to younger players
For kids under 12, the goal of football drawing is not to produce a coaching-quality diagram. The goal is to help them understand the game. A simple chalkboard with circles for players and arrows for routes is plenty. Encourage them to draw their own plays, even if the symbols are not the standard ones. The act of deciding where a player should line up and what he should do is where the learning lives.
Many youth programs use play art cards with the offense and defense printed on heavy paper, and the kids can move magnets around on a magnetic board. This works well for ages 6 to 9. By age 10 or 11, most players can start drawing their own simple routes from a formation, and by middle school they can be expected to keep a small notebook of their own.
Parents and teachers can also use football drawing as a way to teach broader skills. Drawing a play requires planning, sequencing, and communication. The same skills that make a good diagram make a good essay outline. Coaches who take drawing seriously often find that their players develop stronger verbal explanation skills as a side effect.
Digital tools for modern football drawing
There is no shortage of football drawing software, and the right choice depends on the level of the program. Sideline tablets like Microsoft Surface and iPad-based systems have largely replaced dry-erase boards at the higher levels, and they let coaches draw plays with their finger, save them instantly, and share them with the quarterback through a wrist-mounted screen.
For youth and high school programs, a free or low-cost option is enough. Basic whiteboard apps, simple vector tools, or even PowerPoint with stencils can do the job. The advantage of going digital is that the diagrams can be searched, sorted, and shared. The disadvantage is that the team needs devices, batteries, and a backup plan in case the technology fails. Most coaches still keep a physical whiteboard and a sharpie in their bag for that reason.
If you are drawing for personal study rather than for a team, a notebook and pencil is often the best tool. The friction of drawing by hand is part of the learning. Typing on a tablet can feel productive, but it does not build the same mental model of the play.
How football drawing connects to game film study
Game film is the most detailed source of feedback a coach has, and football drawing is how the lessons from film get translated into the practice plan. A coach who watches film with a notepad will end the session with a stack of small diagrams showing the opponent’s tendencies. Those diagrams become the foundation of the game plan for the next week.
The same process works for players. A receiver who watches his own film can draw his own routes on a printed template and check whether the stem depth and break angle match the playbook. A quarterback can sketch the coverage he actually saw on a play and compare it to the pre-snap read he thought he had. The drawing is a way of forcing the eye to slow down and check the small details.
The best programs use both at once. They project a clip on a screen, and the coach draws the play on a whiteboard next to the screen, talking through what is happening. The combination of motion and a real-time sketch is one of the most efficient teaching methods in the sport. It is also the closest a player will get to a sideline timeout experience before they actually reach the field.
From sideline sketch to artistic illustration
There is also a side of football drawing that has nothing to do with coaching. Illustrators and graphic artists draw football scenes for posters, magazine covers, and fan art. The skills are related but the priorities are different. An artistic drawing of a quarterback is meant to capture motion, emotion, and proportion. A schematic drawing of a play is meant to communicate information at speed.
If you are interested in the artistic side, the most useful thing you can do is study anatomy and movement. The way a lineman sets his feet, the way a quarterback coils before a throw, the way a receiver extends for a catch are all things that a good illustration captures. Watching film in slow motion and sketching from still frames is a common practice for sports illustrators.
Schematic and artistic drawing feed each other. A coach who can sketch a clean play is more likely to understand what a great illustration is showing. An illustrator who understands the route tree will draw a more believable receiver. Both skills benefit from the same underlying study of the game.
Building a personal football drawing practice
Like any skill, football drawing improves with deliberate practice. A few habits will accelerate the learning curve.
- Draw a play a day: Pick a play you ran or watched and draw it from memory, then check it against the actual diagram. The gap between what you drew and what was called is the part you actually learned.
- Redraw a coach’s diagram in your own style: The goal is not to copy the diagram exactly. The goal is to translate the same idea into a form your own hand can produce quickly.
- Teach someone else: The fastest way to find a hole in your understanding is to try to explain a play to a teammate. The diagram you have to draw for that explanation is your real test.
- Time yourself: A sideline diagram should take under a minute. If you cannot draw a play in a minute, simplify it until you can.
- Review your own work: A notebook of old diagrams is a record of your growth. Look back at the plays you drew three months ago and notice what you have stopped doing.
Practice does not have to be formal. Sketching a play you saw on television while the broadcast is still on is enough to start. The point is to put pen to paper often enough that the symbols and the field layout become automatic.
Where football drawing fits in a coaching career
For coaches, the skill is professional. A new coach who can draw a clean play in under a minute is more useful in a staff meeting than one who cannot. A coordinator who can sketch a defensive adjustment on the fly is more likely to be trusted with game planning. A head coach who can sketch on a whiteboard for a recruit’s family is more likely to make a strong impression.
None of this requires being a good artist. Football drawing is closer to engineering drawing than to fine art. The aim is clarity, not beauty. The diagrams that work best in a team room are the ones that a tired player can read at 9 p.m. on a Friday after a long day of school. Simple lines, clear labels, and a small set of symbols are what get the message across.
For a coach just starting out, the best investment is a small set of good habits. Use a field template. Stick to three colors. Label the skill positions. Draw arrows that end in arrowheads. Label the play. After a season of doing this, the diagrams will be a permanent part of the program, and the players will know how to read them on sight.
A short checklist for your next football drawing
Before you put the marker down, run through this list. It will save you a redraw later.
- The field is in proportion, with the long axis six times the short axis.
- The line of scrimmage is clearly marked, with the direction of the offense shown.
- Every skill position is labeled with a number or position code.
- Routes are drawn with dashed lines ending in arrowheads.
- Run paths are drawn with solid lines ending in arrowheads.
- Defensive players are in a different color from offensive players.
- The play name, formation, and snap count are written in a corner.
- There are no more than three colors in the whole diagram.
If you can check those boxes in under a minute, you are drawing at a level that any coaching staff can use. If you cannot, slow down and focus on the lines and labels first. The arrows and the coverage details can wait until the basic structure is right.
Putting it into practice this week
If you want to build the skill, give yourself a small assignment. Pick a single play from a recent game you watched. Draw the formation with the players labeled. Add the routes and the blocking assignments. Then, without looking at the original, draw it again a day later. The two drawings will not be identical, and the differences are exactly what you need to work on. Repeat the exercise with a defensive play and an offensive play from your own team.
Within a few weeks, you should notice that the field proportions come out right without measuring, that the symbols are consistent, and that the diagram takes less time to draw. That is when football drawing has moved from a task you do into a language you speak. From there, the next step is to teach it to someone else, which is the real test of whether you have learned it.
Frequently asked questions
What is the easiest way to start football drawing as a beginner?
Start with a printed field template and a pencil. Draw the formation first, label every player, and add one or two simple routes in dashed lines with arrowheads. Avoid trying to draw a complete game plan on your first attempt.
What symbols are used in football drawing for offensive players?
The most common convention uses a circle for the center, a triangle for the quarterback, and open circles or X’s for running backs and receivers. Each player is labeled with a position or jersey number, and the line of scrimmage is drawn as a solid line.
How do coaches draw defensive coverages on a whiteboard?
Defensive players are drawn in a different color from the offense, often with squares or triangles for linebackers and defensive backs. The coverage is labeled in a corner of the diagram, and any blitzing players are marked with an X over their symbol.
What is the standard field proportion for a football drawing?
The total field with end zones is six times as long as it is wide, and the playing field between the goal lines is five times as long as it is wide. Hash marks are spaced five yards apart, and end zones are 10 yards deep.
Can football drawing be used to study game film?
Yes. Coaches and players often sketch what they see on film onto a printed template, then compare the sketch to the actual play call. The act of drawing forces the eye to slow down and notice the small details, which improves recall.
Do professional teams still use physical whiteboards for football drawing?
Many do, as a backup or for quick diagrams. Sideline tablets are common at the college and professional level, but a physical board is faster to set up and more reliable in bad weather, which is why most coaches still carry a marker and an eraser in their kit.
How long does it take to draw a single play in football drawing?
For an experienced coach, a clean schematic play takes 30 to 60 seconds. Beginners should aim for under two minutes per play, and the speed will improve with practice. The constraint is usually the labels and the arrowheads, not the lines themselves.
What is the difference between a run arrow and a pass arrow in football drawing?
Run paths are drawn as solid lines, while pass routes are drawn as dashed lines. Both end in arrowheads to show direction. A curved dashed line usually means an option or choice route, where the player reads the defense after the snap.
Can kids learn football drawing?
Yes. Children as young as eight can start with simple formations and basic routes, especially if they are drawing the plays they run in their own youth program. The activity supports both football understanding and broader planning skills.
What tools are best for taking football drawings on the road?
A small sketchbook, a few fine-tip markers in three colors, and a printed field template are enough. Coaches who travel often keep a roll of clear adhesive paper in their bag so they can sketch on a window, a clipboard, or any flat surface available.